Exercise 1: Cascaded PID control
In this exercise, you will learn how to write and tune a cascaded PID controller for the CrazyFlie (ex_1_pid_control.py). As seen in the lecture, it takes a position and yaw setpoint as an input and generates pwm signals for the motors as output:

Task overview
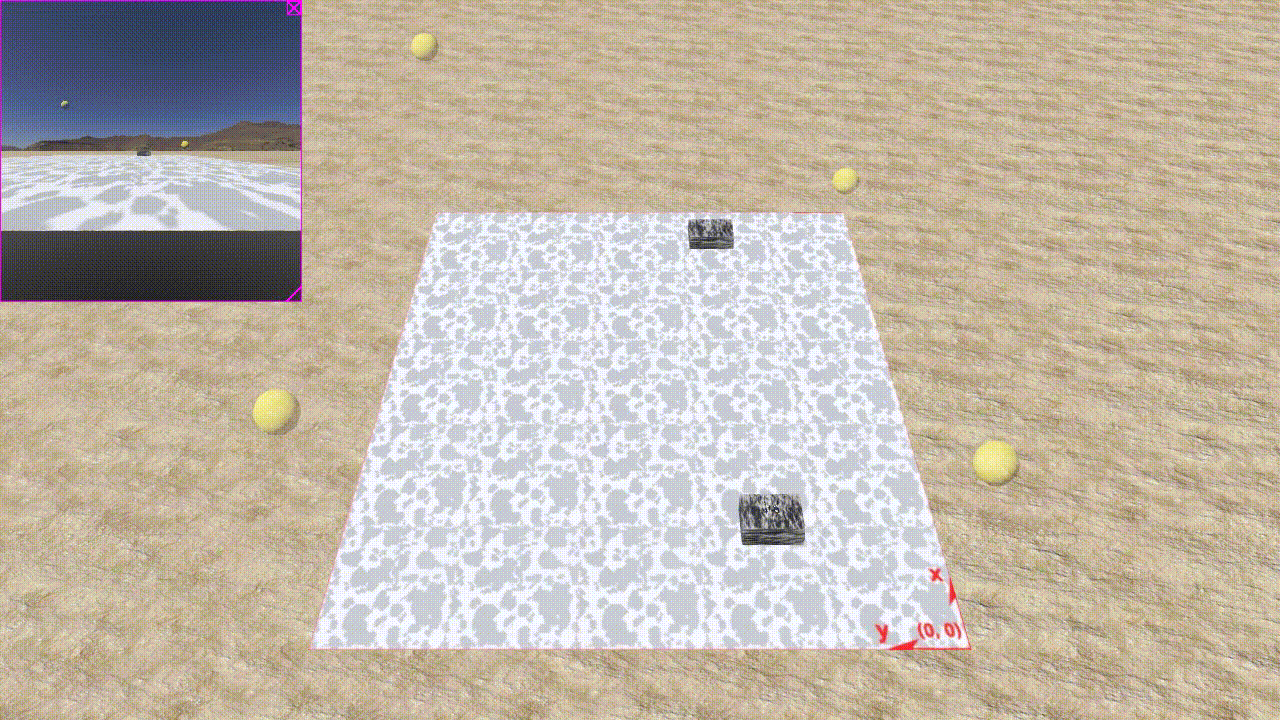
To start, make sure that you are in main.py, exp_num = 1 and control_style = “keyboard”. You can now run the simulation on webots (crazyflie_world_excercise). Currently, only a lowlevel controller is implemented, allowing you to control the CrazyFlie over the keyboard. Feel free to play around with the keys for a bit before continuing. Your task is to implement a cascaded PID controller and tune it to make your drone fly as fast as possible through a given path, marked by the four spheres.
Exercise
Start by opening ex_1pid_control.py and go to the function setpoint_to_pwm. You will see that the function is empty. This is where you will implement your cascaded PID controller.
Now you can run it: In main.py, switch control_style = “path_planner”. This will let the drone fly the path autonomously (a message in the command line will let you know how long the drone took to complete the lap). This should look like this and since the gains are untuned, will take a bit over half a minute:
It’s time to tune your gains. Include the tuning functions that are provided self.tuning(min,max,duration,dt,setpoint,sensor_measurement, “message for plotting”). They will send step inputs to your drone and plot the most important metrics for tuning.
4. Start by tuning the gains for the z-velocity controller. Set self.tuning_level = “vel_z”. You can now run the simulation and tune your gains. After two iterations, a plot displays the most important metrics for tuning:
Rise time: How long it takes the system to reach the reference. This should be as short as possible.
Overshoot: How much your system exceeds the reference after reaching it. This should stay within a certain range (we suggest less than 10%).
Steady state error: Your system might not converge fully to your reference within a period of the step function. This should stay within a certain range (we suggest less than 5%).

As a general rule of thumb, we propose the following strategy: - Start with a small P and I,D = 0. - Increase P until you see an overshoot. - Increase D until the overshoot vanishes (D is usually smaller than P). - Repeat last two steps until increasing D does no longer stabilize your system and leads to oscillatory behaviour. - Reduce P by 20% and adapt D accordingly. This ensures robust behaviour when operating in unforseen cases (e.g. roll and pitch at the same time). If this is not respected, you might end up with unexpected behaviour (e.g. oscillations) when tuning higher levels. - If necessary, increase I to counteract steady state error: e.g. on “vel_z” to counteract gravity, or on “vel_xy” to counteract drag.
This should lead you to similar performance:

Now you can do the same for z-position by switching self.tuning_level = “pos_z”. Once you are done, your drone can hover in a stable manner, allowing tuning the other gains.
In a cascaded controller higher levels send references to lower ones. That’s why you always tune from the bottom up. Next up, do self.tuning_level = “vel_y_setpoint” and finally self.tuning_level = “pos_y_setpoint”. Every cycle should make your tuning better and the lab completion time faster. Our gains look like this:

Once you are happy with your gains, you can disable tuning (self.tuning_level = “off”). Please send your gains and your best lap time to simon.jeger@epfl.ch with the subject “exercise 1”.
Our best time is 12.6 s. Let the fastest drone win!